Waterproofing tapes are used for various applications throughout the automotive, building, and construction markets. Many of these applications require a permanent bond to the substrate to prevent water or vapor permeation, but how do you know your tape application will meet that requirement?
One way to assess the bond is by testing the tape’s peel adhesion to the substrate being used. While peel testing can help to determine compatibility between the tape and the substrate, it can also help you figure out if the surface preparation or application procedures are adequate to provide the required adhesion. Peel testing is a destructive test method. It is often used prior to the start of a project to verify that the application procedure will result in an acceptable bond and to confirm that the project requirements are met.
As stated, peel adhesion testing is a destructive test because the tape needs to be removed from the substrate to get the peel value. Often for a new application, a mock-up of the tape’s intended usage is designed to determine which surface preparation, if any, is needed to achieve the desired bond. (You’ll learn more about surface preparation later in this article.) When creating and testing a mock-up is not feasible and you perform the peel test post application, a repair using the same tape is required. Be sure to review manufacturer application guidelines for the proper repair procedure.
For controlled testing of peel adhesion in a lab, ASTM D1000 is often followed. ASTM D1000 involves using a table mounted tensile tester under controlled parameters like temperature, dwell time, peel rate and peel angle. When a peel test is completed in the field, however, some modifications to this standard are required. Below is a list of equipment needed to run the test and some step-by-step instructions.
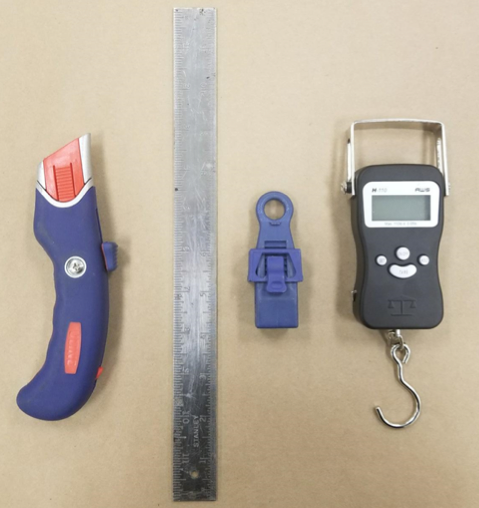
The tools you’ll need are:
- a utility knife,
- a steel ruler or straightedge,
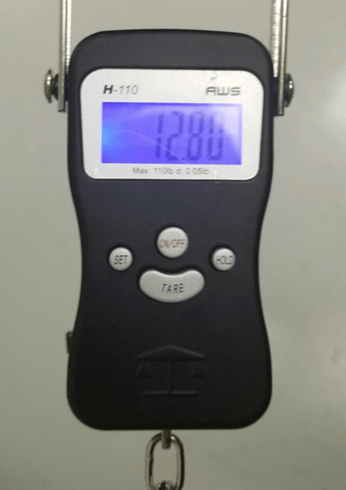
- a digital fish scale or similar gauge capable of measuring at least 20 pounds, and
- a tarp clip or other means of attaching the scale to the tape.
Instructions
- Apply the tape to the surface. Allow at least 15 minutes and up to 24 hours for the tape to bond to the substrate.
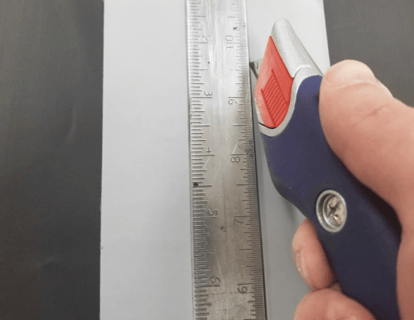
- Cut two parallel lines one inch apart in the tape. Be sure to cut completely through the tape. Ideally the lines will be about six inches long, but a shorter length can be tested if needed.
3. Cut across one end of the strip and pull the tape back about one inch. The tarp clip can then be attached to this tab. The remaining strip should be marked at one-inch intervals to help assure that the peel speed is maintained throughout the test.
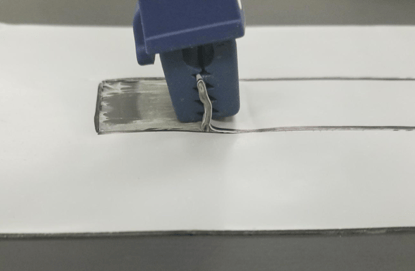
4. Turn on the fish scale and make sure it reads zero pounds. Place the hook on the tarp clip and pull perpendicularly to the substrate so the tape forms a 90° angle. Pull at a uniform rate so one inch of tape is removed every five seconds.
5. Take note of the value on the scale as you pass each one-inch mark and have someone record it. Average the recorded values. The average value should be divided by the peel strip width (one inch in this case) to obtain the peel strength in pounds per inch width (lb/in). This is often also referred to as peel strength in pounds per linear inch (PLI).
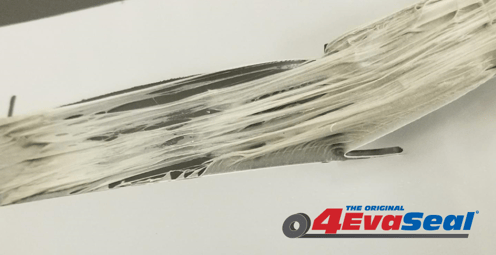
6. Examine the area where the tape was removed and the strip of tape to determine the mode of separation. The mode will be adhesive, cohesive, or a mixture of the two.
The Results:
- If a cohesive peel mode is achieved during the test, it confirms that the surface preparation was adequate to achieve a permanent bond. Typically, a cohesive peel mode will occur with a peel force of 10-15 pounds per inch width depending on the temperature when tested.
- If the testing results in an adhesive peel mode (the tape pulls cleanly off the substrate), the value and application requirements become important to determine if the adhesion level is adequate.
There are several reasons why a tape may have low adhesion to a substrate. Some substrates such as wood, steel, and polyethylene are relatively easy to bond, but other surfaces -- polypropylene and EPDM (synthetic rubber), for instance -- can be more difficult due to their low surface energy. Regardless of the substrate material, it is important to make sure it is clean and dry. Some substrates will also require a solvent wipe to help clean the surface and improve the surface energy. Finally, the substrate and tape temperatures can also affect the initial adhesion or “green strength.”
In order to improve adhesion values, one or more of the items below may be utilized to create a more suitable application method for your particular project:
- Use a solvent wipe to clean non-porous substrates. Some solvents can also improve the surface energy of the substrate, but not all solvents are created equal. Solvents such as acetone and isopropyl alcohol are helpful for cleaning, but toluene and methyl ethyl ketone (MEK) is sometimes more suitable for improving the surface energy. Avoid solvents that leave an oily residue, and be cautious of “green” solvents that may have very long drying times or leave residue.
- Utilize a primer. Primers are commonly used on concrete and other hard-to-adhere-to surfaces.
- Be sure to apply pressure to the tape using a J-Roller. Most waterproofing tapes utilize a pressure sensitive adhesive; greater adhesion is achieved when there is better contact between the substrate and tape.
- Increase the temperature of the substrate and/or tape if the job is being applied in an environment with a low ambient temperature. A longer dwell time before testing may also be required in cold temperatures because the adhesive will wet into the substrate more slowly.
Following the simple steps outlined above will help assure a successful application. Not confirming adequate adhesion can result in premature failure leading to costly repairs. It is also important to consult with the tape manufacturer prior to installation to review surface preparation and installation recommendations specific to each project.
Interested in using or specifying waterproofing tapes on your project? Click here to contact a representative to learn how 4EvaSeal tapes can provide a waterproof seal on your project.