
Single-ply roof membranes are plastic or rubber roofing materials that consist of one thin layer of material. The most common types of single-ply roof membranes are EPDM rubber roof membranes, PVC roof membranes, and TPO roof membranes. These roofs can vary in thickness from 40 mils to 80 mils (1/16” +/-).
These roofing materials are susceptible to punctures, tears, and other damage. It is also common for seams and penetrations to leak when they are not detailed properly. When damage or leaks develop, the simplest and most effective remedy is to seal the area with a self-adhesive tape designed to repair roof leaks.
Self-adhesive materials bond to the roof system with greater force in warmer temperatures. If repairs are needed in cold weather, be prepared to heat the surface and the tape with a hair dryer or heat gun. Heat should be applied when making repairs below 50°F and MUST be used making repairs below 32°F.
Materials needed to make repairs with self-adhesive tapes on single-ply roofs include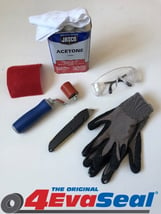
- cleaner or detergent (e.g., Simple Green or 409) for removing all dirt from the repair area;
- scrub brushes, clean water, and rags;
- solvent cleaners, such as xylene, MEK, or acetone;
- rubber gloves;
- utility knife or good pair of scissors;
- seam roller for tape;
- hair dryer or heat gun for cold weather repairs; and
- trash bags.
Waterproofing tapes designed to repair roofs are easy to use. Follow these steps to make your repair:
- Using the cleaner or detergent, scrub the area that requires repair. Clean well beyond the repair margins to assure all surfaces are clean and to prevent contamination from making its way to the area that will receive the waterproofing tape. Use clean fresh water to remove any soapy residue after cleaning is complete. Allow the area to dry completely.
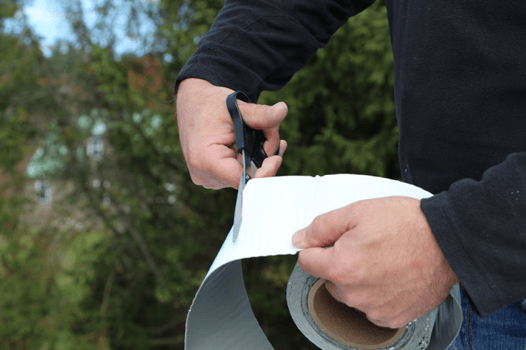
2. Measure and cut the waterproofing tape to size. The tape should extend beyond the hole, tear, seam, etc., a minimum of two to four inches in all directions.
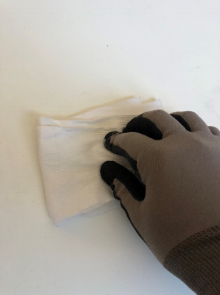
3. Solvent wipe the surface using clean dry rags dampened with xylene, MEK, or acetone. Allow the solvent to flash off (dry).
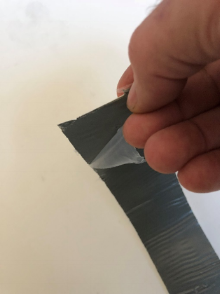
4. Remove the release liner from the adhesive side of the tape and carefully install the tape. There MUST BE NO WRINKLES in the tape. Wrinkles are pathways for water and should not be present.
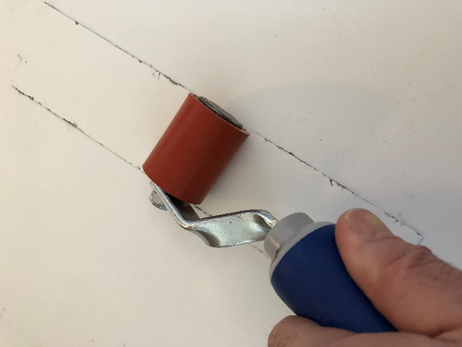
5. Using the roller, apply firm pressure and roll over the tape several times in different directions (north/south, east/west) to assure that the tape has made good contact with the roof.
Note: If the repair is being made in cold weather, use the hair dryer or heat gun to warm the tape and the surface during steps 4 and 5.
It is always recommended that you test the bond strength of the repair. Follow the instructions from the following blog to learn how to test adhesion on your project. Read blog here.
Avoid common mistakes.
When a repair results in a poor bond among the roof patch, the waterproofing tape, and the single-ply roof, the cause is likely one or more of the following mistakes:
- failure to clean the surface,
- applying the waterproofing tape to a wet surface,
- poor tape selection,
- solvent cleaning with oily solvents such as paint thinner or mineral spirits, and/or
- failure to apply heat in cold temperatures.
Here are some final recommendations:
Make sure the waterproof tape selected for the repair is suitable for use on your single-ply roof membrane, is UV stable, and is designed to provide a long-term watertight seal when exposed to wet conditions.
Want to know more about how to use 4EvaSeal tapes for roofing repairs or to receive a sample to test adhesion to your roof? Click here ….